Step-by-Step Guide to Prepare Super Quick Homemade Lemon Pound Cake
with a Simple Lemon Glaze

Step-by-Step Guide to Prepare Super Quick Homemade Lemon Pound Cake with a Simple Lemon Glaze

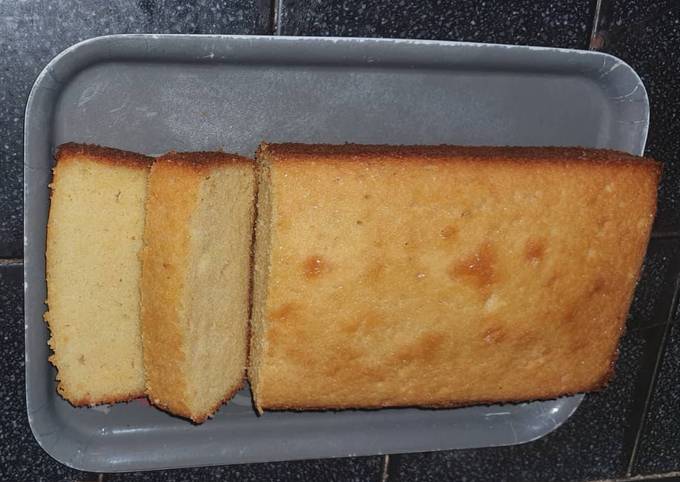
Lemon Pound Cake with a Simple Lemon Glaze.

Lemon Pound Cake with a Simple Lemon Glaze

Hello everybody, I hope you are having an incredible day today. Today, I'm gonna show you how to make a special dish, lemon pound cake with a simple lemon glaze. One of my favorites food recipes. For mine, I'm gonna make it a little bit tasty. This is gonna smell and look delicious.

Lemon Pound Cake with a Simple Lemon Glaze is one of the most favored of recent trending foods in the world. It's easy, it is quick, it tastes yummy. It is enjoyed by millions every day. Lemon Pound Cake with a Simple Lemon Glaze is something which I've loved my entire life. They are fine and they look wonderful.

To get started with this particular recipe, we have to prepare a few ingredients. You can have lemon pound cake with a simple lemon glaze using 13 ingredients and 10 steps. Here is how you cook it.

The ingredients needed to make Lemon Pound Cake with a Simple Lemon Glaze:

  1. {Prepare of and 1/2 cup all-purpose flour.
  2. {Take of granulated sugar.
  3. {Make ready of baking powder.
  4. {Get of salt.
  5. {Prepare of unsalted butter, at room temperature.
  6. {Make ready of large eggs, at room temperature.
  7. {Make ready of fresh lemon juice.
  8. {Prepare of whole milk.
  9. {Get of vanilla extract.
  10. {Take of Lemon glaze.
  11. {Prepare of fresh lemon juice.
  12. {Make ready of granulated sugar.
  13. {Take of water.

Steps to make Lemon Pound Cake with a Simple Lemon Glaze:

  1. In a large mixing bowl, combine the butter and sugar and beat with an electric mixer on medium speed for 5 minutes, scraping down the sides of the bowl as and when needed and until the mixture is a paler colour and sugar is dissolved or almost fully dissolved..
  2. Next, crack the eggs into a bowl and beat with a fork just until the whites and yolks are well combined..
  3. To the sugar butter mixture, add in the eggs in 4 parts beating for about 50 seconds after each addition. To that, add in the milk, vanilla and lemon juice and beat for another 30 seconds on medium speed until everything is well combined..
  4. After, sift in the flour, baking powder and salt, and on low speed, beat until a smooth and thick but light batter is formed. With a spatula, give the batter a quick mix to ensure everything is well incorporated..
  5. Pour the cake batter into a greased 5 × 9 inch loaf pan and tap afew times on the counter to get rid of any air bubbles..
  6. Bake in a preheated oven at 325 degrees fahrenheit on the center rack for 40 minutes and then move to the top rack for an additional 20 minutes. After 60 minutes, a toothpick inserted should come out clean, if not, put the oven off but leave the cake in for 10 minutes, it should be done by then..
  7. While the cake cools, combine all the ingredients for the glaze in a medium saucepan over medium low heat and cook until the sugar fully dissolves..
  8. With a toothpick or a bamboo skewer, poke random holes all over the surface of the cake and pour the glaze all over the cake. Let the cake cool in the pan for about 20 minutes and then run a knife around the edges to take it out..
  9. Place on a serving platter and serve warm. I found caramel sauce goes well with this cake but is delicious as is as well..
  10. This cake keeps well in the refrigerator for up to 4 days in an airtight container and can also be frozen for up to 2 weeks in cling film and then foil. Happy baking!.

So that is going to wrap this up with this special food lemon pound cake with a simple lemon glaze recipe. Thank you very much for reading. I'm sure that you will make this at home. There is gonna be more interesting food at home recipes coming up. Don't forget to bookmark this page on your browser, and share it to your family, colleague and friends. Thank you for reading. Go on get cooking!

Steps to Prepare Quick Baked Spiral Ham and Honey Mustard Glaze

Steps to Prepare Quick Baked Spiral Ham and Honey Mustard Glaze

Baked Spiral Ham and Honey Mustard Glaze.

Baked Spiral Ham and Honey Mustard Glaze

Hey everyone, it is Drew, welcome to our recipe page. Today, I will show you a way to make a special dish, baked spiral ham and honey mustard glaze. One of my favorites. This time, I'm gonna make it a bit unique. This will be really delicious.

Baked Spiral Ham and Honey Mustard Glaze is one of the most popular of current trending meals on earth. It's simple, it is quick, it tastes yummy. It is appreciated by millions every day. Baked Spiral Ham and Honey Mustard Glaze is something which I have loved my whole life. They're fine and they look fantastic.

To get started with this recipe, we must prepare a few ingredients. You can cook baked spiral ham and honey mustard glaze using 6 ingredients and 5 steps. Here is how you cook that.

The ingredients needed to make Baked Spiral Ham and Honey Mustard Glaze:

  1. {Make ready 1 of Spiral Sliced Bone-in Ham.
  2. {Take of For Glaze:.
  3. {Get 1 Cup of Packed Brown Sugar.
  4. {Get 2 TBSP. of Mustard.
  5. {Prepare 2 TBSP. of Honey.
  6. {Make ready 2 TBSP. of Water.

Instructions to make Baked Spiral Ham and Honey Mustard Glaze:

  1. Heat ingredients for glaze in a small saucepan on warm. Do not boil. Warm and stir until all lumps are gone and glaze is dark in color and glossy. Set aside..
  2. Don't cheap out on your ham. Pay the money and get a good spiral sliced Bone-in ham. You really do get what you pay for!.
  3. Place ham flat side down in roaster with lid OR foil lined and foil covered pan. Add 1 cup of water only. Ham creates it's own juice as it cooks. For a 7 to 12 lb. Ham, bake at 275° for 12 to 15 minutes per pound..
  4. At the end of calculated baking time, remove ham from oven and pour or spoon glaze over ham so that glaze runs in between the slices. Return to oven uncovered for 10 more minutes @ 450°.
  5. Slice and place ham on serving plate for serving..

So that is going to wrap it up for this exceptional food baked spiral ham and honey mustard glaze recipe. Thanks so much for your time. I am sure you will make this at home. There's gonna be interesting food at home recipes coming up. Don't forget to bookmark this page in your browser, and share it to your loved ones, friends and colleague. Thank you for reading. Go on get cooking!

Recipe of Any-night-of-the-week Brad's red wine braised ox tail w/
cauliflower puree

Recipe of Any-night-of-the-week Brad's red wine braised ox tail w/ cauliflower puree

Brad's red wine braised ox tail w/ cauliflower puree.

Brad's red wine braised ox tail w/ cauliflower puree

Hello everybody, hope you are having an incredible day today. Today, we're going to make a distinctive dish, brad's red wine braised ox tail w/ cauliflower puree. One of my favorites food recipes. This time, I am going to make it a bit tasty. This will be really delicious.

Brad's red wine braised ox tail w/ cauliflower puree is one of the most favored of recent trending foods in the world. It's appreciated by millions daily. It is simple, it's fast, it tastes yummy. They are nice and they look fantastic. Brad's red wine braised ox tail w/ cauliflower puree is something that I have loved my entire life.

To get started with this particular recipe, we must prepare a few components. You can have brad's red wine braised ox tail w/ cauliflower puree using 28 ingredients and 11 steps. Here is how you can achieve that.

The ingredients needed to make Brad's red wine braised ox tail w/ cauliflower puree:

  1. {Take of For the ox tail.
  2. {Get of large pieces of ox tail. I had almost 2 lbs.
  3. {Prepare of Seasoned salt, garlic powder, black pepper, and onion powder.
  4. {Get of Ground coriander.
  5. {Prepare of + 2 tbs canola oil.
  6. {Take of medium onion, chopped.
  7. {Get of minced garlic.
  8. {Get of beef broth.
  9. {Get of red wine, I used cabernet sauvignon.
  10. {Prepare of Italian parsley.
  11. {Get of For the reduction.
  12. {Make ready of large shallot, sliced thin.
  13. {Take of portobello mushrooms, sliced into bight sized pieces.
  14. {Make ready of butter.
  15. {Make ready of garlic.
  16. {Make ready of cream sherry.
  17. {Make ready of cabernet sauvignon.
  18. {Prepare of red wine vinegar.
  19. {Make ready of brown sugar.
  20. {Prepare of drippings from the ox tail.
  21. {Take of For the cauliflower puree.
  22. {Prepare of pine nuts.
  23. {Make ready of lg head cauliflower, remove core and separate florets.
  24. {Get of beef broth.
  25. {Make ready of Sea salt and white pepper.
  26. {Prepare of butter.
  27. {Get of Drizzle of heavy cream.
  28. {Make ready of Bourbon barrel aged cheese, or whatever cheese you like.

Instructions to make Brad's red wine braised ox tail w/ cauliflower puree:

  1. Place ox tail on a plate. Coat well with spices on both sides. Refrigerate for a couple hours..
  2. Heat a large frying pan on medium heat with 2 tbs oil. Brown ox tail on both sides.
  3. At the same time, my one pot has a saute mode. I like using this before I pressure cook because it gets everything good and hot. Heat one pot on saute mode with 2 tbs oil. Add onion and saute until translucent. Add garlic and saute for 2 minutes..
  4. Add broth and red wine to the one pot. Bring to a simmer. Add the ox tail to the one pot and lay parsley on top. Seal and pressure cook for 70 minutes..
  5. Next, get a small frying pan. Heat on medium. Toast the pine nuts in a dry pan until golden. Stir often. When done, set aside..
  6. The next two steps take about 20 minutes, so time accordingly with the cooking and decompress time of the pressure cooker..
  7. In a large sauce pot, add cauliflower and cover with beef broth. Bring to a simmer covered. Simmer until stalks are very soft..
  8. At the same time, heat a large frying pan over medium heat. Add shallots, portobello, and butter. Saute until shallots start to caramelize. Add garlic, and saute for 2 minutes. Add both wines, vinegar, and brown sugar. Let liquid reduce by at least half, maybe more. Turn to low and wait until ox tail is done..
  9. When ox tail is done, and the lid is safely off of the pressure cooker, add 1 cup of the broth from the oxtail to the reduction. Turn heat to medium high, and reduce by half again..
  10. At the same time, drain cauliflower. While still hot, add butter. Use an immersion blender to whip together. When well blended, slowly add cream and blend until mixture is light and smooth. This doesn't take much, I used less than a 1/4 cup. Season to taste..
  11. Plate the cauliflower in a shallow bowl. Shred some cheese over the top. Sprinkle with pine nuts. Add oxtail to one side. Spoon reduction over the top of the oxtail. Garnish with minced chives. Serve immediately. Enjoy..

So that's going to wrap this up with this special food brad's red wine braised ox tail w/ cauliflower puree recipe. Thanks so much for your time. I'm sure that you will make this at home. There's gonna be more interesting food in home recipes coming up. Remember to save this page on your browser, and share it to your family, colleague and friends. Thanks again for reading. Go on get cooking!

Steps to Make Award-winning Black Tea & Peach Smoothie

Steps to Make Award-winning Black Tea & Peach Smoothie

Black Tea & Peach Smoothie.

Black Tea & Peach Smoothie

Hello everybody, I hope you are having an amazing day today. Today, I'm gonna show you how to prepare a distinctive dish, black tea & peach smoothie. One of my favorites food recipes. For mine, I will make it a bit tasty. This will be really delicious.

Black Tea & Peach Smoothie is one of the most popular of recent trending foods in the world. It is easy, it is fast, it tastes yummy. It is appreciated by millions daily. Black Tea & Peach Smoothie is something which I have loved my entire life. They are fine and they look fantastic.

To get started with this particular recipe, we have to prepare a few components. You can cook black tea & peach smoothie using 5 ingredients and 3 steps. Here is how you can achieve it.

The ingredients needed to make Black Tea & Peach Smoothie:

  1. {Prepare 2 of Black tea bags.
  2. {Make ready 1 1/4 cup of boiling water.
  3. {Make ready 1 tbsp of Superfine sugar.
  4. {Make ready 2/3 cup of ripe yellow saturn peach.
  5. {Prepare 2/3 cup of Babcock (white peach).

Instructions to make Black Tea & Peach Smoothie:

  1. Put the tea bags in a teapot or heatproof pitcher and pour over the boiling water. Let infuse for 7 minutes. Remove and discard the tea bags. Let chill..
  2. Pour the chilled tea into a blender. Add the sugar and peaches, and process until smooth..
  3. Serve at once..

So that's going to wrap it up with this exceptional food black tea & peach smoothie recipe. Thank you very much for reading. I am confident you can make this at home. There is gonna be interesting food in home recipes coming up. Don't forget to save this page on your browser, and share it to your loved ones, colleague and friends. Thank you for reading. Go on get cooking!

How to Make Award-winning Chicken Eugene

How to Make Award-winning Chicken Eugene

Chicken Eugene.

Chicken Eugene

Hello everybody, I hope you are having an amazing day today. Today, I'm gonna show you how to make a special dish, chicken eugene. It is one of my favorites food recipes. For mine, I am going to make it a little bit unique. This will be really delicious.

Chicken Eugene is one of the most favored of current trending meals in the world. It is enjoyed by millions every day. It's easy, it is quick, it tastes delicious. Chicken Eugene is something that I have loved my entire life. They are fine and they look wonderful.

To begin with this recipe, we must first prepare a few ingredients. You can have chicken eugene using 6 ingredients and 7 steps. Here is how you can achieve it.

The ingredients needed to make Chicken Eugene:

  1. {Get of Chicken breasts.
  2. {Prepare of cream of mushroom soup.
  3. {Prepare of container of sour cream.
  4. {Take of butter.
  5. {Make ready of wine or sherry.
  6. {Make ready of paprika.

Steps to make Chicken Eugene:

  1. Preheat oven to 350.
  2. Season chicken breasts with salt, pepper and half of the paprika and place in a glass 9x13 baking dish.
  3. Heat soup and butter in a pan over the stove until warm..
  4. Stir in wine and then sour cream until smooth, this only takes a minute or two..
  5. Poor mixture over chicken and sprinkle with remaining paprika..
  6. Cover with foil and bake for 45 minutes..
  7. Serve over egg noodles or rice.

So that's going to wrap it up with this special food chicken eugene recipe. Thank you very much for reading. I'm sure you can make this at home. There is gonna be more interesting food in home recipes coming up. Don't forget to bookmark this page on your browser, and share it to your loved ones, colleague and friends. Thank you for reading. Go on get cooking!

Recipe of Super Quick Homemade Sinigang na baboy sa sampalok (porridge
with tamarind)

Recipe of Super Quick Homemade Sinigang na baboy sa sampalok (porridge with tamarind)

Sinigang na baboy sa sampalok (porridge with tamarind).

Sinigang na baboy sa sampalok (porridge with tamarind)

Hello everybody, it is Brad, welcome to my recipe site. Today, I'm gonna show you how to prepare a special dish, sinigang na baboy sa sampalok (porridge with tamarind). One of my favorites food recipes. For mine, I'm gonna make it a bit tasty. This is gonna smell and look delicious.

Sinigang na baboy sa sampalok (porridge with tamarind) is one of the most favored of current trending foods in the world. It is simple, it's quick, it tastes yummy. It's enjoyed by millions daily. Sinigang na baboy sa sampalok (porridge with tamarind) is something that I've loved my entire life. They are nice and they look wonderful.

To begin with this particular recipe, we have to prepare a few components. You can have sinigang na baboy sa sampalok (porridge with tamarind) using 14 ingredients and 6 steps. Here is how you can achieve that.

The ingredients needed to make Sinigang na baboy sa sampalok (porridge with tamarind):

  1. {Make ready of kilo pork (any part).
  2. {Make ready of water.
  3. {Prepare of Fish sauce.
  4. {Get of Tomatoes.
  5. {Make ready of Large onion.
  6. {Take of taro.
  7. {Make ready of Tamarind.
  8. {Prepare of radish.
  9. {Prepare of String beans.
  10. {Make ready of okra.
  11. {Take of green chilli.
  12. {Get of Rosemary.
  13. {Prepare of Egg plant.
  14. {Take of Kang kong.

Instructions to make Sinigang na baboy sa sampalok (porridge with tamarind):

  1. Saute the pork with onions and tomatoes then put your fish sauce.
  2. Put 8 to 10 cups of waterand let it boil.
  3. Add all the vegetables except the kangkong leaves and green chillis.
  4. Simmer and wait for 1 hour.
  5. Put the kangkong leaves and green chillis then wait for about 5 to 10 minutes.
  6. Then serve it.

So that's going to wrap it up with this exceptional food sinigang na baboy sa sampalok (porridge with tamarind) recipe. Thanks so much for your time. I am confident that you will make this at home. There's gonna be more interesting food in home recipes coming up. Don't forget to save this page on your browser, and share it to your loved ones, friends and colleague. Thank you for reading. Go on get cooking!

Recipe of Favorite Pancit w Shrimps and Chicken

Recipe of Favorite Pancit w Shrimps and Chicken

Pancit w Shrimps and Chicken.

Pancit w Shrimps and Chicken

Hey everyone, I hope you're having an incredible day today. Today, we're going to make a special dish, pancit w shrimps and chicken. One of my favorites. For mine, I will make it a little bit unique. This is gonna smell and look delicious.

Pancit w Shrimps and Chicken is one of the most favored of current trending foods in the world. It's easy, it's fast, it tastes delicious. It is enjoyed by millions daily. They are fine and they look fantastic. Pancit w Shrimps and Chicken is something which I have loved my entire life.

To get started with this recipe, we must prepare a few ingredients. You can have pancit w shrimps and chicken using 19 ingredients and 5 steps. Here is how you cook it.

The ingredients needed to make Pancit w Shrimps and Chicken:

  1. {Take of Miki Pancit noodles.
  2. {Take of Shrimps deshelled marinate in Lemon Juice, garlic powder and pepper.Cover and put in fridge.
  3. {Prepare of Chicken boiled and flake save stock.
  4. {Get 2 of Onions sliced.
  5. {Get 6 cloves of garlic chopped.
  6. {Take sticks of Carrots peeled and tops and roots cut then sliced into.
  7. {Prepare of Celery chopped.
  8. {Prepare of Snap peas ends cut.
  9. {Take of Young corn tops and bottoms cut sliced Down the middle.
  10. {Make ready of Green pepper chopped into stivks.
  11. {Take of Chinese cabbage chopped.
  12. {Get of For Pancit sauce.
  13. {Take of Chicken stock.
  14. {Prepare of Soy sayce.
  15. {Get of Oyster sauce.
  16. {Prepare Pinch of sugar.
  17. {Get of Garlic powder.
  18. {Prepare of Sesame oil.
  19. {Get of Pepper.

Instructions to make Pancit w Shrimps and Chicken:

  1. In hot wok or pan with hot sesame oil sprinkle garlic powder and sauté shrimps until shrimps turn color. Then set aside.
  2. Then stir fry and toss garlic, onions, celery, peppers, and Chicken add a little pancit sauce then add the carrots, baby corn and snap peas.Stir fry and toss.
  3. Then add noodles and stir together mix in remaining sauce. Just keep mixing everything together.
  4. Sprinkle shrimps on top season with pepper and the chopped Chinese cabbage then to finish sprinkle sesame oil. Turn off heat and this is what it looks like.
  5. Isn’t that beautiful.

So that is going to wrap this up for this special food pancit w shrimps and chicken recipe. Thank you very much for your time. I'm sure that you can make this at home. There's gonna be interesting food at home recipes coming up. Don't forget to bookmark this page in your browser, and share it to your loved ones, friends and colleague. Thanks again for reading. Go on get cooking!

Step-by-Step Guide to Make Favorite French Onion Skillet

Step-by-Step Guide to Make Favorite French Onion Skillet

French Onion Skillet.

French Onion Skillet

Hello everybody, it is Brad, welcome to my recipe site. Today, I will show you a way to make a distinctive dish, french onion skillet. It is one of my favorites food recipes. This time, I am going to make it a little bit unique. This will be really delicious.

French Onion Skillet is one of the most well liked of recent trending foods on earth. It's appreciated by millions daily. It's easy, it's quick, it tastes delicious. French Onion Skillet is something which I have loved my entire life. They're nice and they look wonderful.

To get started with this particular recipe, we must first prepare a few components. You can cook french onion skillet using 14 ingredients and 14 steps. Here is how you can achieve that.

The ingredients needed to make French Onion Skillet:

  1. {Prepare of butter.
  2. {Take of Dense bread, cubed, enough to cover bottom of cast iron skillet.
  3. {Get of cubed, shredded, minced, sliced meat of your choice.
  4. {Get of can French Onion soup.
  5. {Take of Sour cream.
  6. {Take of mozzarella cheese, shredded.
  7. {Make ready of Optional:.
  8. {Take of Mushrooms.
  9. {Take of Onions.
  10. {Take of Thyme.
  11. {Take of Substitions:.
  12. {Prepare of Bread cubes can be substituted with boxed stuffing mixes.
  13. {Take of Provolone or Swiss work as alternative cheese options.
  14. {Prepare of Beef broth can sub for French onion soup.

Steps to make French Onion Skillet:

  1. I pulled everything out of my fridge and pantry that needed to be used up TODAY. Then I tapped my foot with my hands on my hips, tilted my head and chewed on my lip, wrinkled my forehead and.... Well this is where I ended up.....
  2. Melt 2 Tbsp butter in an iron skillet, or an oven proof skillet. I use a skillet because I'm going to cook, stick in the fridge and reheat after my kids basketball game..
  3. Preheat oven to 375 degrees.
  4. Cube bread into 1" or hearty bite sized pieces, needs to hold up during saucing process but not so big you need to cut it up later..
  5. Once butter has melted and just started to brown, throw in the bread, move around to cover the bottom of the skillet but do not toss it. You want an even layer of buttered, slightly fried bread. Remove from heat once bread has started to brown..
  6. Next, top with meat. I minced up some leftover steak in my food processor and sprinkled it all over. With the flavor combinations in this recipe, red meat definitely works best, but you do not have to mince the meat, just avoid large pieces that will require additional cutting at serving time..
  7. Then I pulled out some leftover canned mushrooms.. Sighed... I went to the store today, failed to buy some fresh fungi and this is what I'm left with. Which, as I took the picture I had the realization they may be the ugliest of the foods. Proceed to chop the mushrooms, continue to contemplate using a grocery list.... Sprinkle those ugly little pieces of yumminess on top the bread and steak skillet..
  8. In a bowl whisk 1 can French onion soup and 8 oz. of sour cream together. If you only have a partial container of sour cream, just add some milk or cream to make up the difference..
  9. Pour the sour cream mixture on top of the skillet meal you have assembled..
  10. Bake at 375 degrees for about 20 to 25 minutes..
  11. Shred 8 oz. of mozzarella or as much cheese as you want, or until your arm gets tired, or until you hit your knuckle on the cheese grater.... Probably works to tear open a package of shredded cheese too... I didn't buy any at the store today... Grocery lists people....
  12. Now decide how soon you're going to eat... If you are hungry go ahead and top the skillet with the cheese and pop it back in the oven for a couple minutes or let it sit covered while you pull together the rest of your meal. For me this is a make ahead meal, so I shredded my cheese on a piece of foil. Then I wrapped it up in a little pouch and threw it in the fridge with the cooled, prepared skillet. "Threw" may not be the appropriate verb here..
  13. Later..... I pull skillet out of fridge, top with cheese, cover with foil, and heat on the stove top over a medium low heat... While trying to get my kids to shower and put away their sports gear and I try to find my cork screw and wine (which strangely enough I remembered without a grocery list....) Hmmmm......
  14. Enjoy :).

So that's going to wrap this up with this special food french onion skillet recipe. Thank you very much for reading. I'm sure that you can make this at home. There's gonna be interesting food at home recipes coming up. Don't forget to save this page on your browser, and share it to your family, friends and colleague. Thank you for reading. Go on get cooking!

Simple Way to Prepare Homemade Halloween bento box

Simple Way to Prepare Homemade Halloween bento box

Halloween bento box.

Halloween bento box

Hey everyone, hope you are having an amazing day today. Today, I'm gonna show you how to prepare a distinctive dish, halloween bento box. It is one of my favorites food recipes. This time, I'm gonna make it a little bit unique. This is gonna smell and look delicious.

Halloween bento box is one of the most popular of recent trending meals on earth. It is enjoyed by millions every day. It's simple, it is quick, it tastes delicious. They're nice and they look wonderful. Halloween bento box is something that I have loved my entire life.

To get started with this particular recipe, we have to first prepare a few components. You can have halloween bento box using 12 ingredients and 10 steps. Here is how you cook it.

The ingredients needed to make Halloween bento box:

  1. {Take of Rice.
  2. {Take of Salt.
  3. {Get of Seaweed.
  4. {Take of Sausages.
  5. {Make ready of Cherry tomatoes.
  6. {Make ready of Tomato ketchup.
  7. {Prepare of Egg.
  8. {Prepare of Dashi.
  9. {Prepare of Syoyu.
  10. {Get of Cabbage.
  11. {Get of Frozen corn.
  12. {Get of Green beans.

Steps to make Halloween bento box:

  1. Cut seaweed by knife or scissors.
  2. Make onigiri.
  3. Slice cabbage.
  4. Cut green beans in small pieces.
  5. Fry corn and green beans.
  6. Make dashimaki egg roll.
  7. Cut sausage in half, make wrinkles of finger by cutting few lines. Also slice off nail part on the end. Then toast till cooked..
  8. Use tomato ketchup on nail part to glue sliced tomato..
  9. Arrange everything in a bento box. Put seaweed on onigiri carefully. Use tweezers if needed..
  10. Enjoy!!.

So that is going to wrap it up for this special food halloween bento box recipe. Thank you very much for reading. I'm confident that you can make this at home. There is gonna be interesting food in home recipes coming up. Don't forget to bookmark this page on your browser, and share it to your family, colleague and friends. Thanks again for reading. Go on get cooking!

Recipe of Award-winning Pescador Salad

Recipe of Award-winning Pescador Salad

Pescador Salad.

Pescador Salad

Hello everybody, it's Drew, welcome to my recipe page. Today, I will show you a way to make a special dish, pescador salad. It is one of my favorites food recipes. This time, I am going to make it a bit tasty. This will be really delicious.

Pescador Salad is one of the most well liked of current trending meals in the world. It's easy, it is quick, it tastes yummy. It's enjoyed by millions every day. Pescador Salad is something which I've loved my entire life. They are nice and they look fantastic.

To begin with this particular recipe, we must prepare a few components. You can have pescador salad using 21 ingredients and 4 steps. Here is how you cook that.

The ingredients needed to make Pescador Salad:

  1. {Get 250 g of white rice.
  2. {Get Handful of raisins.
  3. {Take 2 of grated carrots.
  4. {Make ready 100 g of smoked turkey.
  5. {Make ready 100 g of mozzarella (cubes).
  6. {Prepare 100 g of cheese (cubes)🧀.
  7. {Make ready 100 g of smoked cheese (cubes).
  8. {Take 200 g of shrimp 🍤.
  9. {Get 200 g of broccoli 🥦.
  10. {Get 4 of potatoes🥔 (cubes).
  11. {Take 3 of eggs.
  12. {Prepare 3 of cucumbers 🥒 cut to circles.
  13. {Take of Lettuce 🥬.
  14. {Get 200 g of mushrooms.
  15. {Take 2 of avocados 🥑.
  16. {Get 100 g of Surimi.
  17. {Get 200 g of corn 🌽.
  18. {Get 1 of mango 🥭.
  19. {Prepare 1 of peach 🍑.
  20. {Get of Persil.
  21. {Prepare jar of Mayonnaise.

Steps to make Pescador Salad:

  1. Boil separately with salt then rince the rice, broccoli, potatoes, eggs..
  2. After grating and cutting all the ingredients to small cubes or just slices, add the raisin to the rice..
  3. Prepare your sauce by mixing the mayonnaise, olive oil, lemon juice, salt and black pepper, add some water to make it more smooth..
  4. Start your layers: on the serving dish, add the lettuce as a base, the grated carrots in the sides and the rice and raisins in the middle, pour some sauce on top, add the potatoes, broccoli, cucumber, and the cheese, add some sauce on top, the mango, peach, avocado, shrimp, smoked turkey, Surimi, eggs, corn and mushroom and some sauce again ! Voilà ! Bon appétit 💌.

So that's going to wrap it up with this special food pescador salad recipe. Thanks so much for reading. I am confident you will make this at home. There is gonna be interesting food at home recipes coming up. Don't forget to save this page on your browser, and share it to your loved ones, friends and colleague. Thank you for reading. Go on get cooking!

Recipe of Perfect Creamy chicken noodle bake

Recipe of Perfect Creamy chicken noodle bake

Creamy chicken noodle bake.

Creamy chicken noodle bake

Hey everyone, it's Jim, welcome to my recipe site. Today, I'm gonna show you how to make a distinctive dish, creamy chicken noodle bake. One of my favorites food recipes. This time, I will make it a bit tasty. This is gonna smell and look delicious.

Creamy chicken noodle bake is one of the most popular of current trending foods on earth. It's easy, it's quick, it tastes delicious. It is appreciated by millions daily. Creamy chicken noodle bake is something that I have loved my whole life. They are fine and they look wonderful.

To begin with this particular recipe, we must first prepare a few components. You can have creamy chicken noodle bake using 15 ingredients and 7 steps. Here is how you can achieve it.

The ingredients needed to make Creamy chicken noodle bake:

  1. {Get of diced cooked chicken.
  2. {Prepare of frozen mix vegetables.
  3. {Make ready of onion or frozen seasoning blend peppers onions & celery.
  4. {Make ready of cream of chicken.
  5. {Prepare of sour cream.
  6. {Prepare of salt.
  7. {Prepare of black pepper.
  8. {Make ready of garlic powder.
  9. {Make ready of dried parsley.
  10. {Get of better than chicken bouillon.
  11. {Get of frozen reames noodles cooked per package instructions.
  12. {Prepare of stove top stuffing mix chicken or turkey flavor 👇.
  13. {Get of Cooked per box instructions I use chicken broth instead of water.
  14. {Get of chicken broth.
  15. {Make ready of I can't believe its not butter spray.

Steps to make Creamy chicken noodle bake:

  1. Pre heat oven to 375 degrees and spray a 9 × 13 inch baking dish with I can't believe its not butter..
  2. Mix sour cream, both cans of cream of chicken, better than bouillon, salt, pepper, garlic and parsley. Mix well and set aside..
  3. Mix noodles and vegetables together and spray with butter spray and then mix with sour cream soup mixture till it's well combined then evenly pour in 1/2 cup chicken broth..
  4. Top with prepared stuffing evenly and spray with butter spray..
  5. Bake covered for 30 minutes and then 20 minutes with foil off.
  6. Let it rest for a few minutes then enjoy..
  7. .

So that's going to wrap it up with this special food creamy chicken noodle bake recipe. Thanks so much for reading. I'm sure that you can make this at home. There's gonna be interesting food at home recipes coming up. Don't forget to save this page on your browser, and share it to your loved ones, colleague and friends. Thank you for reading. Go on get cooking!

Step-by-Step Guide to Prepare Award-winning White chocolate peppermint
brownies:

Step-by-Step Guide to Prepare Award-winning White chocolate peppermint brownies:

White chocolate peppermint brownies:.

White chocolate peppermint brownies:

Hey everyone, hope you are having an incredible day today. Today, I will show you a way to make a distinctive dish, white chocolate peppermint brownies:. One of my favorites. This time, I'm gonna make it a little bit tasty. This will be really delicious.

White chocolate peppermint brownies: is one of the most favored of recent trending foods on earth. It's simple, it's fast, it tastes delicious. It is appreciated by millions every day. White chocolate peppermint brownies: is something which I have loved my entire life. They are nice and they look wonderful.

To begin with this recipe, we must first prepare a few components. You can cook white chocolate peppermint brownies: using 6 ingredients and 6 steps. Here is how you cook it.

The ingredients needed to make White chocolate peppermint brownies::

  1. {Get of Fudge Brownie mix.
  2. {Take of Eggs (per box directions).
  3. {Get of Oil (per box directions).
  4. {Prepare of Peppermint Extract (i left this out).
  5. {Make ready of Peppermint Melting Chips or White chocolate melting Chips.
  6. {Get of crushed Candy Canes or Starlight Mints.

Instructions to make White chocolate peppermint brownies::

  1. Prepare brownie mix according to box directions, but add 1/4 teaspoon peppermint extract..
  2. Allow brownies to cool..
  3. Melt candy chips by microwaving for 60 seconds then stirring and repeating until melted and smooth..
  4. If you used white chips, add 1/4 teaspoon peppermint extract to melted chips. and stir to mix..
  5. Quickly spread melted candy evenly over top of brownies and sprinkle sith crushed mints. Cut before the chocolate sets up..
  6. Notes-If you are making these for a cookie exchange or to add to your holiday spread, I would cut these up into small pieces so everyone can have a little bit of everything..

So that is going to wrap this up for this exceptional food white chocolate peppermint brownies: recipe. Thanks so much for your time. I am sure that you can make this at home. There's gonna be interesting food at home recipes coming up. Remember to bookmark this page on your browser, and share it to your loved ones, friends and colleague. Thank you for reading. Go on get cooking!

How to Prepare Perfect Lavender Vanilla cake

How to Prepare Perfect Lavender Vanilla cake

Lavender Vanilla cake.

Lavender Vanilla cake

Hello everybody, it is Louise, welcome to my recipe page. Today, I will show you a way to prepare a special dish, lavender vanilla cake. It is one of my favorites food recipes. For mine, I am going to make it a bit tasty. This is gonna smell and look delicious.

Lavender Vanilla cake is one of the most popular of recent trending meals in the world. It's simple, it is fast, it tastes yummy. It is enjoyed by millions daily. They are nice and they look fantastic. Lavender Vanilla cake is something that I have loved my entire life.

To begin with this particular recipe, we have to first prepare a few ingredients. You can have lavender vanilla cake using 8 ingredients and 6 steps. Here is how you cook that.

The ingredients needed to make Lavender Vanilla cake:

  1. {Prepare of white sugar.
  2. {Prepare of all purpose flour.
  3. {Get of baking powder.
  4. {Take of large eggs.
  5. {Get of vegetable oil.
  6. {Prepare of vanilla extract.
  7. {Get of vanilla bean pod.
  8. {Get of candies or dried lavender.

Steps to make Lavender Vanilla cake:

  1. Preheat oven to 350 degrees F..
  2. Mix the sugar, and baking powder in a large bowl until combined..
  3. Then, in a separate glass bowl mix the eggs and vegetable oil..
  4. Combine ingredients until smooth but don’t over mix..
  5. Now for the fun part: mix in the vanilla and dried lavender powder in, scrape the caviar out of the bean pod, and mix on low speed in an electric mixer until well combined..
  6. Pour it into a buttered spring form cake pan and bake for 15-30 minutes or until a toothpick inserted in the center comes out clean..

So that's going to wrap it up for this special food lavender vanilla cake recipe. Thank you very much for your time. I'm confident that you will make this at home. There is gonna be more interesting food at home recipes coming up. Don't forget to save this page in your browser, and share it to your loved ones, friends and colleague. Thank you for reading. Go on get cooking!

Recipe of Favorite French toast topping with egg mayo

Recipe of Favorite French toast topping with egg mayo

French toast topping with egg mayo.

French toast topping with egg mayo

Hello everybody, it's Jim, welcome to our recipe site. Today, I'm gonna show you how to prepare a distinctive dish, french toast topping with egg mayo. It is one of my favorites. This time, I am going to make it a little bit tasty. This is gonna smell and look delicious.

French toast topping with egg mayo is one of the most popular of current trending meals in the world. It is simple, it is fast, it tastes delicious. It's enjoyed by millions daily. They're fine and they look wonderful. French toast topping with egg mayo is something that I have loved my whole life.

To get started with this particular recipe, we have to first prepare a few components. You can have french toast topping with egg mayo using 13 ingredients and 6 steps. Here is how you can achieve that.

The ingredients needed to make French toast topping with egg mayo:

  1. {Prepare of Part A.
  2. {Prepare 2 of - Plain square bread.
  3. {Prepare 2 of - eggs(lightly beaten).
  4. {Get 1 tbsp of fresh milk.
  5. {Prepare Pinch of salt.
  6. {Prepare Pinch of brown sugar.
  7. {Get Pinch of cinnamon powder.
  8. {Make ready 1 tbsp of unsalted butter.
  9. {Prepare of Part B.
  10. {Get 2 of hard boiled eggs.
  11. {Make ready 3 tsp of mayonnaise.
  12. {Prepare Pinch of salt.
  13. {Get Pinch of black pepper.

Instructions to make French toast topping with egg mayo:

  1. Prepare the egg mixture by mixing all Part A ingredients except the bread and butter..
  2. Soak the bread into eggs mixture for 30seconds or let the bread fully absorb the eggs. Use saucepan n medium low heat melted a quarter of butter, pan fry the bread turn into golden brown toast. Repeat adding a quarter of butter pan fry for another side. Cook the 4sides of toast before platter. Redo for 2nd slice of bread..
  3. Mix well all the part B ingredients into egg mayo..
  4. Use a 1/3 measurement cup, lightly wipe with some cooking oil(I used kitchen towel), scoop the egg mayo n place on TOP the French toast, drizzle with some maple syrup..
  5. Decorated with some shallots..
  6. Serve well with coffee and tomato baked bean..

So that's going to wrap this up for this exceptional food french toast topping with egg mayo recipe. Thank you very much for your time. I am sure you will make this at home. There is gonna be more interesting food at home recipes coming up. Remember to save this page in your browser, and share it to your loved ones, friends and colleague. Thank you for reading. Go on get cooking!

Easiest Way to Prepare Perfect Cold macaroni salad

Easiest Way to Prepare Perfect Cold macaroni salad

Cold macaroni salad.

Cold macaroni salad

Hey everyone, it's me again, Dan, welcome to my recipe page. Today, I will show you a way to make a distinctive dish, cold macaroni salad. It is one of my favorites food recipes. For mine, I am going to make it a bit tasty. This will be really delicious.

Cold macaroni salad is one of the most well liked of recent trending foods on earth. It's enjoyed by millions every day. It's simple, it's fast, it tastes delicious. They are nice and they look wonderful. Cold macaroni salad is something that I have loved my whole life.

To get started with this particular recipe, we have to prepare a few components. You can have cold macaroni salad using 6 ingredients and 4 steps. Here is how you cook that.

The ingredients needed to make Cold macaroni salad:

  1. {Prepare 16 oz of box of noodles.
  2. {Prepare As needed of Diced up meat (ham, bologna).
  3. {Make ready 1/2 of chopped up onion.
  4. {Take As needed of Small block of cheese diced up.
  5. {Get 1 bottle of salad dressing (Any kind of salad dressing you like).
  6. {Take As needed of Dan of oil.

Steps to make Cold macaroni salad:

  1. Boil the noodles with a dab of oil so they don’t stick.
  2. Chop onions, meat, cheese while noodles are cooking..
  3. Drain noodles and rinse in cold water until noodles are cool..
  4. Mix everything together and refrigerate..

So that is going to wrap it up with this special food cold macaroni salad recipe. Thanks so much for reading. I'm confident that you will make this at home. There's gonna be interesting food at home recipes coming up. Don't forget to save this page on your browser, and share it to your loved ones, friends and colleague. Thank you for reading. Go on get cooking!

Recipe of Perfect Bakery style chocolate chip muffins

Recipe of Perfect Bakery style chocolate chip muffins

Bakery style chocolate chip muffins. These bakery-style chocolate chip muffins are BIG in size, flavor, and texture. Today's homemade chocolate chip muffins rival any from a bakery. They're large and in charge, bursting with flavor, and are topped with a sweet sparkly sugar crunch.

Bakery style chocolate chip muffins The BEST chocolate chip muffin recipe. These bakery-style muffins are moist, fluffy, loaded with chocolate chips, and have a perfect. These Chocolate Chip Muffins are studded with mini chocolate chips and are super moist thanks to the butter and sour cream in the batter.

Hello everybody, it's John, welcome to my recipe page. Today, I will show you a way to prepare a special dish, bakery style chocolate chip muffins. One of my favorites. This time, I am going to make it a little bit unique. This will be really delicious.

These bakery-style chocolate chip muffins are BIG in size, flavor, and texture. Today's homemade chocolate chip muffins rival any from a bakery. They're large and in charge, bursting with flavor, and are topped with a sweet sparkly sugar crunch.

Bakery style chocolate chip muffins is one of the most popular of current trending meals in the world. It is enjoyed by millions every day. It is simple, it is quick, it tastes delicious. They are nice and they look fantastic. Bakery style chocolate chip muffins is something which I've loved my whole life.

To get started with this particular recipe, we have to prepare a few ingredients. You can cook bakery style chocolate chip muffins using 12 ingredients and 13 steps. Here is how you can achieve that.

The ingredients needed to make Bakery style chocolate chip muffins:

  1. {Make ready 4 of Tblsp unsalted butter melted and cooled at least 5 minutes.
  2. {Prepare 1/4 cup of canola oil (may substitute vegetable oil).
  3. {Take 1 cup of sugar.
  4. {Get 1 of large egg + 1 egg white room temperature preferred.
  5. {Take 1 1/2 tsp of vanilla extract.
  6. {Make ready 1/2 cup of buttermilk room temperature(2Tbsp powder& 1/2 cup water).
  7. {Make ready 1 3/4 cup of all purpose flour.
  8. {Prepare 2 tsp of baking powder.
  9. {Get 2 tsp of corn starch.
  10. {Make ready 1/2 tsp of salt.
  11. {Make ready 1 cup of chocolate chips.
  12. {Get 1/3 cup of additional granulated sugar, coarse sugar for topping.

Now get baking a batch of your own, your taste buds will thank you. For these bakery-style muffins, you'll need Bakery-style muffins are big muffins with BIG & BOLD flavor — and this Bakery-Style Double Chocolate Chip Muffins recipe is my Best-Ever! What's the Best Chocolate For Double Chocolate Chip Muffins? Semi-sweet or bittersweet chocolate is best!

Instructions to make Bakery style chocolate chip muffins:

  1. Combine butter and canola oil in a large bowl. Stir well..
  2. Stir in sugar..
  3. Add egg, egg white and vanilla extract. Stir very well, until all ingredients are thoroughly combined..
  4. Add buttermilk and stir well..
  5. In a separate bowl, whisk together flour, baking powder, corn starch and salt..
  6. Fold dry ingredients into wet gently, taking care not to over mix. Once about half of the dry ingredients have been incorporated into the better, add in chocolate chips and continue to fold in to better until all ingredients are just combined..
  7. Cover bowl with a dry towel and allow better to sit 15 minutes.
  8. Preheat oven to 425F and line muffin tin with paper liners..
  9. Once oven has preheated, portion bar into 6-cavity large muffin tin (you may also use regular, 12 count muffin tin, you will just need to bake them for less time), filling each tin all the way to the top with batter (without overflowing)..
  10. Sprinkle tops generously with sugar and place muffin tin in preheated oven..
  11. Bake at 425F for 8 minutes and then reduce the oven temperature to 350F (do not open the oven door or remove the muffins, just leave them in and reduce the temperature) and bake another 15 minutes, or until tops are just beginning to turn golden brown (if you are using a 12-count muffin tin rather than jumbo - sized, these will not need to bake as long. Start checking your muffins after 7-8 minutes on 350F)..
  12. Allow to cool, and enjoy..
  13. Notes.

They give you the perfect balance of. I feel like adding chocolate chips to everything I bake and so on this National Chocolate Chip Day I bring you these bakery style Chocolate Chip Muffins!. To make them look prettier, I sprinkled the chocolate chip muffins with some turbinado sugar on top before putting them in the oven. Now you can bake up Bakery-Style Double Chocolate Chip Muffins at home with this easy, no-fuss recipe. And indulge any day of the week!

So that's going to wrap this up for this exceptional food bakery style chocolate chip muffins recipe. Thank you very much for reading. I'm sure that you will make this at home. There is gonna be more interesting food in home recipes coming up. Don't forget to save this page on your browser, and share it to your loved ones, friends and colleague. Thank you for reading. Go on get cooking!

Step-by-Step Guide to Prepare Any-night-of-the-week Easy Oven-baked BBQ
Chicken

Step-by-Step Guide to Prepare Any-night-of-the-week Easy Oven-baked BBQ Chicken

Easy Oven-baked BBQ Chicken.

Easy Oven-baked BBQ Chicken

Hello everybody, I hope you're having an incredible day today. Today, I will show you a way to prepare a distinctive dish, easy oven-baked bbq chicken. One of my favorites food recipes. This time, I am going to make it a bit unique. This will be really delicious.

Easy Oven-baked BBQ Chicken is one of the most well liked of recent trending meals in the world. It's simple, it's fast, it tastes yummy. It's enjoyed by millions daily. They are fine and they look wonderful. Easy Oven-baked BBQ Chicken is something which I've loved my whole life.

To get started with this particular recipe, we have to first prepare a few components. You can cook easy oven-baked bbq chicken using 2 ingredients and 3 steps. Here is how you cook that.

The ingredients needed to make Easy Oven-baked BBQ Chicken:

  1. {Take 3 tbsp of any spice rub for chicken.
  2. {Take 3 tbsp of BBQ sauce.

Instructions to make Easy Oven-baked BBQ Chicken:

  1. Marinate the chicken with spice rub and bbq sauce. Let sit for 30 minutes in the fridge..
  2. Bake at 200°C for 30 minutes..
  3. If chicken comes out dry, add a bit more bbq sauce while they are still hot..

So that is going to wrap this up with this special food easy oven-baked bbq chicken recipe. Thanks so much for reading. I'm confident that you will make this at home. There is gonna be more interesting food in home recipes coming up. Remember to bookmark this page in your browser, and share it to your loved ones, colleague and friends. Thanks again for reading. Go on get cooking!

Steps to Make Speedy Fruit Salsa

Steps to Make Speedy Fruit Salsa

Fruit Salsa.

Fruit Salsa

Hey everyone, it is Brad, welcome to our recipe page. Today, we're going to prepare a distinctive dish, fruit salsa. It is one of my favorites food recipes. For mine, I am going to make it a little bit unique. This is gonna smell and look delicious.

Fruit Salsa is one of the most favored of current trending meals on earth. It is easy, it is fast, it tastes yummy. It's appreciated by millions every day. Fruit Salsa is something that I've loved my whole life. They're nice and they look fantastic.

To get started with this particular recipe, we have to first prepare a few components. You can cook fruit salsa using 11 ingredients and 4 steps. Here is how you can achieve that.

The ingredients needed to make Fruit Salsa:

  1. {Prepare of Sugar.
  2. {Take 2 of green apples.
  3. {Make ready 5 of kiwis.
  4. {Prepare 1 package of strawberries.
  5. {Take 1 can of peaches.
  6. {Make ready 1 tablespoon of apple jelly.
  7. {Take 1 tablespoon of brown sugar.
  8. {Make ready of Chips.
  9. {Take 1 package of tortillas.
  10. {Get of Cinnamon.
  11. {Prepare of Salsa.

Instructions to make Fruit Salsa:

  1. Finely chop (peeled) green apples, strawberries, peaches, and kiwi. Mix in a bowl..
  2. Add brown sugar and apple jelly..
  3. Mix equal parts cinnamon and sugar in a dish. Run cold water over a tortilla and then sprinkle with cinnamon sugar. With the pizza cutter, cut tortilla into 8 sections..
  4. Place tortilla slices on a baking stone, and bake at 350° for 6-8 minutes to use as chips for salsa..

So that is going to wrap this up with this exceptional food fruit salsa recipe. Thanks so much for reading. I am sure that you will make this at home. There's gonna be interesting food in home recipes coming up. Remember to bookmark this page on your browser, and share it to your loved ones, friends and colleague. Thank you for reading. Go on get cooking!

Steps to Prepare Ultimate Mini Caramel Custard Tart (Custard Pudding
Tart)

Steps to Prepare Ultimate Mini Caramel Custard Tart (Custard Pudding Tart)

Mini Caramel Custard Tart (Custard Pudding Tart).

Mini Caramel Custard Tart (Custard Pudding Tart)

Hey everyone, it is Louise, welcome to our recipe site. Today, we're going to prepare a distinctive dish, mini caramel custard tart (custard pudding tart). One of my favorites. This time, I'm gonna make it a little bit unique. This will be really delicious.

Mini Caramel Custard Tart (Custard Pudding Tart) is one of the most well liked of current trending meals in the world. It's easy, it is quick, it tastes yummy. It is appreciated by millions daily. Mini Caramel Custard Tart (Custard Pudding Tart) is something which I've loved my whole life. They're nice and they look fantastic.

To get started with this particular recipe, we have to first prepare a few components. You can cook mini caramel custard tart (custard pudding tart) using 24 ingredients and 26 steps. Here is how you can achieve it.

The ingredients needed to make Mini Caramel Custard Tart (Custard Pudding Tart):

  1. {Take of For Tart Crust.
  2. {Prepare 55 g of (1/4 us cup, 1.9 oz) unsalted butter, room temperature.
  3. {Get 50 g (5.5 Tbsp) of powdered sugar.
  4. {Take 20 g (1.5 Tbsp) of beaten egg, room temperature.
  5. {Take 20 g (3.5 Tbsp) of almond flour.
  6. {Get 5 drops of vanilla oil.
  7. {Make ready 105 g (3.7 oz) of cake flour.
  8. {Get of beaten egg for brushing on the crust.
  9. {Take of For Custard.
  10. {Get 2 of egg yolks.
  11. {Prepare 30 g (2.5 Tbsp) of granulated sugar.
  12. {Get 70 g (4.7 Tbsp) of milk.
  13. {Take 70 g (4.7 Tbsp) of heavy cream.
  14. {Take 3 g (1 tsp) of powdered gelatin.
  15. {Make ready 1 Tbsp of water, for gelatin.
  16. {Prepare 3 drops of vanilla oil.
  17. {Prepare of For Caramel Jelly.
  18. {Take 60 g of (3/10 us cup) granulated sugar.
  19. {Make ready 2 Tbsp of water, for adding to sugar.
  20. {Prepare 2 Tbsp of water, for adding to cooked caramel.
  21. {Prepare 2 g (2/3 tsp) of powdered gelatin.
  22. {Make ready 1 Tbsp of water, for gelatin.
  23. {Make ready of Topping.
  24. {Make ready of whipped cream.

Instructions to make Mini Caramel Custard Tart (Custard Pudding Tart):

  1. ★Recipe video★ (my You Tube channel)→youtu.be/4j85z_hnGj4.
  2. Muffin mold (27×18×3.5cm, 10.6×7×1.4 in) 1 cup Height : 3.5 cm, upper diameter : 7 cm, lower diameter : 5 cm 1 cup Height : 1.4 in, upper diameter : 2.8 in, lower diameter : 2 in.
  3. 【For Tart Dough】Beat an egg lightly until it gets watery. Prepare 20g (1.5 Tbsp) for the tart dough. (Let the remaining egg sit in a fridge. I'll brush the tart crust with it later.).
  4. Sift powdered sugar; set aside. Sift cake flour twice; set aside. Cream the butter until smooth. Add the powdered sugar in 3 parts. Mix well each addition..
  5. Add the egg in 3 parts. Mix thoroughly after each addition until creamy. Add vanilla oil and mix well..
  6. Add almond flour, and mix well while crushing lumps until combined. Add all the flour at once. Mix it while cutting it, scooping sometimes. Mix it until the lumps form like this (3rd photo)..
  7. Place it on plastic wrap. Press lightly to flatten. Repeat folding and pressing 4-5 times until smooth..
  8. Square it, and wrap with plastic wrap twice. Refrigerate overnight..
  9. 【For Mini Tart Crusts】Brush the muffin mold with butter. Let it sit in a fridge. Take the tart dough out of the fridge, leave it for 10-15 mins to soften. Prepare 6 sheets of 16 cm (6.3'') square parchment paper..
  10. Press the tart dough lightly and soften a little. Divide the dough into 6 parts. Roll each to achieve a rounded ball..
  11. Put a ball on parchment paper, and put plastic wrap over it. Roll out the dough into 11cm (4.3'') circle..
  12. Cut out a circle with a 10.5 cm (4'') mousse ring. Roll out and cut out the remaining 5 balls in the same way. Refrigerate for 20 mins..
  13. Cut the circle pastry into a fan shape (about 1/5) like this, and remove it out. Gently place the pastry in a muffin cup. Line the cup with the pastry while pressing the side gently. Line each cup with the remaining pastry in the same way. (If it gets too soft, please cool it once.).
  14. Prick the bottom of each pastry with a fork. Refrigerate for 30 mins. Preheat an oven to 190℃ / 374 F. Line the pastry cups with paper muffin cases. Fill the inside with tart stones..
  15. Bake it at 170℃ / 338F for 13 mins until the edges just begin to brown. Remove the tart stones and paper cases. Bake it for another 12-15 mins until the center of the pastry is golden..
  16. Let it cool for 5 mins, and brush the tart bottom with beaten egg. Brush and close holes to prevent custard filling from flowing out. Dry it at 200℃ / 392F for 2 mins. Let it cool for 5 mins, and take the tart out from the mold gently. Let it cool; set aside..
  17. 【For Custard Filling】Soak gelatin in the water; set aside. Please put water first and sprinkle gelatin over to prevent unevenness. Add granulated sugar to egg yolk, and stir well until combined. Add heavy cream and milk while stirring. Stir well for a min..
  18. Add vanilla oil, and stir well. Pour the mixture into a small pot. (Prepare ice and a bowl; set aside.).
  19. Warm the mixture for 2-3 mins over low heat while stirring until the steam begins to come out. After turn off the heat, stir for a min to prevent unevenness. Add the gelatin, stir well to melt it thoroughly. (If it doesn't melt, warm it over extremely low heat.).
  20. Pour the mixture into the prepared bowl. Let it cool with ice water. Stir it sometimes, and cool it down to 25℃/ 77F..
  21. Strain the mixture and pour it into each tart cup. Refrigerate them for 2-3 hours to set..
  22. 【For Caramel Jelly】Soak gelatin in the water; set aside. Put the granulated sugar and 2 Tbsp water into a small pot. Cook it over medium heat..
  23. When the edge becomes yellow, move the pot from time to time. When it becomes golden brown or steam comes out strongly, turn off the heat. Add 2 Tbsp water. Please be careful not to burn yourself as the hot caramel will splash..
  24. Move the pot until the caramel becomes smooth. (If lumps form, warm it over low heat until smooth.) Add the gelatin, stir well to melt it thoroughly. (If it doesn't melt, warm it over extremely low heat.).
  25. Strain the caramel. Place a sheet of paper towel gently on the top and take off the sheet slowly to remove the scum. (omissible) Cool it down to 35℃/ 95F..
  26. Pour it over the chilled custard. Refrigerate them for 1-2 hours to set. Top with whipped cream. Done!.

So that is going to wrap it up for this special food mini caramel custard tart (custard pudding tart) recipe. Thank you very much for reading. I am sure you can make this at home. There's gonna be interesting food at home recipes coming up. Remember to bookmark this page in your browser, and share it to your loved ones, colleague and friends. Thank you for reading. Go on get cooking!

Easiest Way to Prepare Favorite Spinach Pie 🥧

Easiest Way to Prepare Favorite Spinach Pie 🥧

Spinach Pie 🥧.

Spinach Pie 🥧

Hello everybody, it is me, Dave, welcome to my recipe site. Today, I will show you a way to make a special dish, spinach pie 🥧. One of my favorites. For mine, I am going to make it a little bit unique. This is gonna smell and look delicious.

Spinach Pie 🥧 is one of the most well liked of current trending meals in the world. It's appreciated by millions every day. It is simple, it's fast, it tastes delicious. Spinach Pie 🥧 is something which I have loved my entire life. They're nice and they look fantastic.

To get started with this particular recipe, we must first prepare a few ingredients. You can have spinach pie 🥧 using 10 ingredients and 5 steps. Here is how you can achieve that.

The ingredients needed to make Spinach Pie 🥧:

  1. {Get of frozen chopped spinach, thawed and drained from extra liquid.
  2. {Prepare of black pepper.
  3. {Prepare of salt.
  4. {Get of crushed red pepper.
  5. {Make ready of minced dried onion.
  6. {Take of ground nutmeg.
  7. {Get of eggs.
  8. {Prepare of heavy cream.
  9. {Prepare of Olive oil cooking spray.
  10. {Take of shredded cheddar cheese.

Steps to make Spinach Pie 🥧:

  1. In a bowl combine: drained spinach, black pepper, salt, crushed red pepper, minced dried onion, ground nutmeg, eggs and heavy cream, whisk well..........
  2. Place your spinach mixture into a round pie pan that has been sprayed with olive oil cooking spray.........
  3. Add your 1 cup of shredded cheddar cheese on top........
  4. Bake in a preheated 375 degree oven for 30 minutes, or until top of spinach pie is golden brown........
  5. Let cool, slice, serve and enjoy 😉!!.

So that is going to wrap this up with this special food spinach pie 🥧 recipe. Thanks so much for your time. I'm confident you can make this at home. There's gonna be interesting food at home recipes coming up. Don't forget to save this page on your browser, and share it to your loved ones, friends and colleague. Thanks again for reading. Go on get cooking!

Recipe of Perfect Chocolate Pie

Recipe of Perfect Chocolate Pie

Chocolate Pie.

Chocolate Pie

Hey everyone, hope you're having an incredible day today. Today, we're going to make a special dish, chocolate pie. One of my favorites. This time, I'm gonna make it a little bit unique. This will be really delicious.

Chocolate Pie is one of the most favored of current trending foods in the world. It's appreciated by millions every day. It's easy, it is fast, it tastes yummy. They're nice and they look wonderful. Chocolate Pie is something which I've loved my whole life.

To begin with this particular recipe, we must prepare a few ingredients. You can cook chocolate pie using 12 ingredients and 4 steps. Here is how you cook that.

The ingredients needed to make Chocolate Pie:

  1. {Prepare 2 cups of sugar.
  2. {Prepare 5 tbsp of unsweetened cocoa powder.
  3. {Prepare 1/4 cup of all-purpose flour.
  4. {Make ready 1 (12 oz) of can evaporated milk.
  5. {Take 1 tsp of vanilla.
  6. {Take 4 of egg yolks.
  7. {Make ready 1/4 cup of butter.
  8. {Get 1 (9 inch) of single pie crust.
  9. {Take of Meringue.
  10. {Prepare 4 of egg whites.
  11. {Make ready 1/4 cup of sugar.
  12. {Make ready of Optional 1/4 tsp cream of tartar.

Instructions to make Chocolate Pie:

  1. Preheat oven 350 degrees. Place all ingredients for pie in small bowls and set aside. Whisk egg yolks in small bowl and set aside..
  2. In a saucepan whisk together 2 cup sugar cocoa and flour. Blend in milk, vanilla and egg yolks. Turn stove to medium heat add butter and stirring constantly just until butter is melted. Pour into unbaked pie shell..
  3. Bake for 35 to 40 minutes or until pie is not wobbly when shaken..
  4. Beat egg whites until soft peaks form. Gradually add sugar beating constantly, until stiff peaks form. Spread meringue on pie and return to oven until meringue is golden. Enjoy!.

So that is going to wrap it up with this exceptional food chocolate pie recipe. Thanks so much for your time. I am sure you will make this at home. There is gonna be interesting food at home recipes coming up. Don't forget to bookmark this page in your browser, and share it to your family, colleague and friends. Thanks again for reading. Go on get cooking!

Recipe of Any-night-of-the-week Pan-Fried Rice Noodle Rolls with Eggs
(酱油王炒腸粉)

Recipe of Any-night-of-the-week Pan-Fried Rice Noodle Rolls with Eggs (酱油王炒腸粉)

Pan-Fried Rice Noodle Rolls with Eggs (酱油王炒腸粉).

Pan-Fried Rice Noodle Rolls with Eggs (酱油王炒腸粉)

Hello everybody, hope you're having an amazing day today. Today, I'm gonna show you how to make a distinctive dish, pan-fried rice noodle rolls with eggs (酱油王炒腸粉). One of my favorites. This time, I will make it a little bit unique. This is gonna smell and look delicious.

Pan-Fried Rice Noodle Rolls with Eggs (酱油王炒腸粉) is one of the most favored of current trending meals in the world. It is simple, it is quick, it tastes delicious. It's appreciated by millions every day. They are nice and they look wonderful. Pan-Fried Rice Noodle Rolls with Eggs (酱油王炒腸粉) is something that I've loved my entire life.

To get started with this particular recipe, we must first prepare a few ingredients. You can have pan-fried rice noodle rolls with eggs (酱油王炒腸粉) using 6 ingredients and 9 steps. Here is how you cook it.

The ingredients needed to make Pan-Fried Rice Noodle Rolls with Eggs (酱油王炒腸粉):

  1. {Take of store bought rice noodle rolls (room temperature).
  2. {Take of large eggs.
  3. {Make ready of green onions.
  4. {Prepare of oyster sauce.
  5. {Make ready of soy sauce.
  6. {Make ready of oil.

Steps to make Pan-Fried Rice Noodle Rolls with Eggs (酱油王炒腸粉):

  1. Cut the rice noodle rolls into 1-2 inch pieces..
  2. Put the oil in the pan and turn it on to high heat - make sure the oil is hot..
  3. Put the rice noodle rolls into the pan (oil may splatter) a bit. Lower the heat. Leave the rolls undisturbed for about 2-3 mins to pan fry the bottoms until golden and crispy..
  4. Remove the rolls into a separate plate..
  5. Put some oil in the pan with the green onions to stir fry them a bit. Break the eggs into the pan and scramble them with the green onions for a couple of seconds (leave the eggs as a wet scramble)..
  6. Put the rich noodle rolls back into the pan. Stir fry them together with the rest of the ingredients..
  7. Put the oyster sauce and continue to stir fry..
  8. Lower the heat and put the soy sauce in. You need to reduce the heat because soy sauce burns quite easily. Stir fry a couple of min..
  9. Serve hot and immediately..

So that is going to wrap this up with this special food pan-fried rice noodle rolls with eggs (酱油王炒腸粉) recipe. Thank you very much for reading. I am confident you will make this at home. There's gonna be more interesting food in home recipes coming up. Don't forget to save this page in your browser, and share it to your family, colleague and friends. Thanks again for reading. Go on get cooking!

Step-by-Step Guide to Make Perfect French vanilla French toast

Step-by-Step Guide to Make Perfect French vanilla French toast

French vanilla French toast. Watch how to make this recipe. Vanilla transforms simple French toast into delicious French toast! The ultimate vanilla custard french toast made with sweet brioche bread dipped in a homemade custard batter and cooked until golden brown.

French vanilla French toast This delicious vanilla French toast is delicious with butter and maple syrup. Add a sprinkle of cinnamon for a spiced flavor. Serve this French toast with fresh berries, sausages, or bacon for a full, hearty breakfast.

Hello everybody, hope you are having an amazing day today. Today, we're going to make a special dish, french vanilla french toast. One of my favorites. This time, I will make it a little bit tasty. This is gonna smell and look delicious.

French vanilla French toast is one of the most popular of recent trending foods in the world. It is appreciated by millions daily. It is simple, it is fast, it tastes yummy. French vanilla French toast is something which I've loved my whole life. They're fine and they look fantastic.

Watch how to make this recipe. Vanilla transforms simple French toast into delicious French toast! The ultimate vanilla custard french toast made with sweet brioche bread dipped in a homemade custard batter and cooked until golden brown.

To get started with this recipe, we have to prepare a few ingredients. You can have french vanilla french toast using 7 ingredients and 1 steps. Here is how you cook that.

The ingredients needed to make French vanilla French toast:

  1. {Prepare 4 of eggs.
  2. {Get 1/2 c of milk.
  3. {Prepare 1/2 c of caramel coffee creamer.
  4. {Make ready 1/2 c of maple syrup.
  5. {Take 2 tbsp of ground cinnamon.
  6. {Get 1 tbsp of vanilla extract.
  7. {Get 1 loaf of French vanilla brioche bread.

Sprinkle with some ground cinnamon or cinnamon sugar, or drizzle with maple. Disclosure: This post may contain affiliate links. - Once you've made your basic french toast mixture with french vanilla Coffee-Mate, grab your FROZEN bread from the freezer. Vanilla transforms simple French toast into delicious French toast! Vanilla French Toast. this link is to an external site that may or may not meet accessibility guidelines.

Instructions to make French vanilla French toast:

  1. Mix all ingredients together and dip bread in the egg mixture and cook for 3 minutes on each side.

Delicious french toast perfect for breakfast you can serve it with maple syrup also. If you like my recipeDon't forget to like and. How to Make Vanilla French Toast. Few breakfasts are better than thick-cut bread slices soaked in vanilla-scented egg and milk custard and. This vanilla French toast is full of secrets: the hint of cardamom, the double-dip method, and the cast iron pan.

So that is going to wrap this up for this special food french vanilla french toast recipe. Thanks so much for reading. I'm sure that you can make this at home. There's gonna be interesting food in home recipes coming up. Don't forget to bookmark this page in your browser, and share it to your family, colleague and friends. Thanks again for reading. Go on get cooking!

Step-by-Step Guide to Prepare Ultimate Stuffed peppers

Step-by-Step Guide to Prepare Ultimate Stuffed peppers

Stuffed peppers.

Stuffed peppers

Hey everyone, hope you are having an incredible day today. Today, we're going to prepare a special dish, stuffed peppers. One of my favorites food recipes. This time, I will make it a bit unique. This will be really delicious.

Stuffed peppers is one of the most favored of recent trending foods on earth. It's easy, it's quick, it tastes yummy. It's enjoyed by millions every day. They're nice and they look fantastic. Stuffed peppers is something that I have loved my entire life.

To get started with this particular recipe, we must prepare a few components. You can cook stuffed peppers using 9 ingredients and 15 steps. Here is how you cook that.

The ingredients needed to make Stuffed peppers:

  1. {Prepare 5 of green peppers, washed, tops cut off & cored.
  2. {Take 2 cans of Del Monte spaghetti sauce at Walmart.
  3. {Prepare 2 of rolls of pork sausage, cooked. I used Great Value brand.
  4. {Make ready of Italian Seasoning I did not measure.
  5. {Get of Black pepper & salt & garlic powder.
  6. {Take of Cooked white rice.
  7. {Make ready 1 of white onion chopped.
  8. {Make ready of Peeled, boiled potatoes to go with as a side.
  9. {Get of I usually mash mine up with a fork, add a bit of butter to them.

Instructions to make Stuffed peppers:

  1. Cut tops off green peppers, core and rinse, dice tops of green peppers, set to the side..
  2. Dice 1 whole white onion, set to the side.
  3. Spray a slow cooker bottom and sides.
  4. Add 1 whole can of sauce to bottom of slow cooker.
  5. Place peppers into crock pot.
  6. Cook rice, add 1 cup of rice to 2 cups boiling water, add olive oil to the water.
  7. Simmer rice 35 minutes, cover with lid..
  8. As the rice cooks, cook the sausage & add diced onion & green pepper diced & add seasonings cook til done..
  9. Add rice to cooked sausage mixture..
  10. Add half of one can of sauce to sausage mixture, stir..
  11. Fill peppers with as much sausage & rice filling as you can..
  12. Put the remaining mixture in between the peppers, filling any gaps..
  13. Add remaining sauce over top of mixture & peppers.
  14. Cook on high for 5 hours.
  15. Serve hot over or with boiled, smashed with a fork potatoes with butter. Yum!!!.

So that is going to wrap it up for this special food stuffed peppers recipe. Thank you very much for your time. I'm confident that you can make this at home. There's gonna be more interesting food in home recipes coming up. Remember to bookmark this page on your browser, and share it to your loved ones, friends and colleague. Thanks again for reading. Go on get cooking!

Recipe of Ultimate Refreshing Pork Don Rice Bowl with Ponzu Sauce and
Grated Daikon Radish

Recipe of Ultimate Refreshing Pork Don Rice Bowl with Ponzu Sauce and Grated Daikon Radish

Refreshing Pork Don Rice Bowl with Ponzu Sauce and Grated Daikon Radish.

Refreshing Pork Don Rice Bowl with Ponzu Sauce and Grated Daikon Radish

Hey everyone, it's me, Dave, welcome to our recipe site. Today, I will show you a way to prepare a special dish, refreshing pork don rice bowl with ponzu sauce and grated daikon radish. One of my favorites food recipes. For mine, I'm gonna make it a little bit tasty. This will be really delicious.

Refreshing Pork Don Rice Bowl with Ponzu Sauce and Grated Daikon Radish is one of the most favored of recent trending foods in the world. It is simple, it is quick, it tastes yummy. It's enjoyed by millions every day. They are fine and they look wonderful. Refreshing Pork Don Rice Bowl with Ponzu Sauce and Grated Daikon Radish is something that I've loved my entire life.

To get started with this particular recipe, we must first prepare a few ingredients. You can cook refreshing pork don rice bowl with ponzu sauce and grated daikon radish using 12 ingredients and 10 steps. Here is how you can achieve it.

The ingredients needed to make Refreshing Pork Don Rice Bowl with Ponzu Sauce and Grated Daikon Radish:

  1. {Take 150 grams of Thinly sliced pork belly.
  2. {Get 1 of Cabbage.
  3. {Get 1 of 6-7 cm thick slice Daikon radish.
  4. {Get 3 of stalks Green onion or scallion.
  5. {Make ready 1 of as much (to taste) for each serving Plain cooked rice.
  6. {Take of To season the pork:.
  7. {Get 2 of to 3 tablespoons Soy sauce.
  8. {Prepare 2 tbsp of Sake.
  9. {Prepare 1 dash of of each Salt and pepper.
  10. {Prepare 1 piece of Grated ginger.
  11. {Take of To put on top before eating:.
  12. {Prepare 1 of Ponzu.

Instructions to make Refreshing Pork Don Rice Bowl with Ponzu Sauce and Grated Daikon Radish:

  1. Cut up the pork belly slices, and marinate in the soy sauce, sake, grated ginger, salt and pepper. Stir-fry the pork until it gets brown..
  2. Grate the daikon radish..
  3. Finely shred the cabbage. (Try to shred it as finely as possible, and it will be much nicer to eat.).
  4. Chop the green onion..
  5. Put some hot rice in large serving bowls..
  6. Mound the shredded cabbage on top of the rice..
  7. Put the cooked pork on top of the cabbage. It already looks yummy!.
  8. Add some grated radish on top of the meat..
  9. Add the chopped green onion, pour the ponzu sauce over and it's done..
  10. Looks great..

So that's going to wrap this up for this exceptional food refreshing pork don rice bowl with ponzu sauce and grated daikon radish recipe. Thank you very much for your time. I'm sure you can make this at home. There is gonna be more interesting food at home recipes coming up. Remember to save this page in your browser, and share it to your loved ones, friends and colleague. Thanks again for reading. Go on get cooking!

Steps to Make Homemade Momma's egg rolls

Steps to Make Homemade Momma's egg rolls

Momma's egg rolls.

Momma's egg rolls

Hey everyone, hope you are having an incredible day today. Today, I will show you a way to make a distinctive dish, momma's egg rolls. One of my favorites food recipes. This time, I am going to make it a little bit unique. This will be really delicious.

Momma's egg rolls is one of the most favored of recent trending meals on earth. It is simple, it's fast, it tastes yummy. It's enjoyed by millions every day. They are fine and they look wonderful. Momma's egg rolls is something that I've loved my whole life.

To get started with this particular recipe, we have to prepare a few ingredients. You can cook momma's egg rolls using 11 ingredients and 15 steps. Here is how you cook it.

The ingredients needed to make Momma's egg rolls:

  1. {Make ready of egg roll wrappers.
  2. {Get of handfulls of shredded carrots (10 if your trump).
  3. {Take of cabbage.
  4. {Get of sausage.
  5. {Prepare of egg.
  6. {Make ready of oyster sauce.
  7. {Get of chopped garlic.
  8. {Make ready of soy sauce.
  9. {Prepare of lime.
  10. {Get of grated Ginger.
  11. {Get of shiitake mushrooms.

Steps to make Momma's egg rolls:

  1. Brown sausage, break it up into the smallest crumbles you can.
  2. Season the sausage with garlic, ginger, oyster sauce, soy sauce, and lime..
  3. Set sausage aside to cool.
  4. Slice cabbage super fine, and put it in a mixing bowl.
  5. Add grated carrots, you can put more or less depending on preference..
  6. Slice shiitake mushrooms super thinly and add to the mixture.
  7. Add the cooled sausage and mix thoroughly..
  8. Place egg roll wrapper in front of you with a corner pointing towards you..
  9. Put a small hand full of the filling in the middle of the wrapper.
  10. Tightly wrap the bottom corner over the filling.
  11. Take each side corner and tuck them in securely.
  12. Beat the egg and paint it on the edges of the top corner of the egg roll wrap(this will help it seal).
  13. Continue to roll the wrap all the way up, keeping it as tight as possible.
  14. Heat your oil until a drop of water sizzles instantly.
  15. Put egg rolls in oil a few at a time and fry until golden brown..

So that's going to wrap this up for this exceptional food momma's egg rolls recipe. Thank you very much for your time. I'm confident you can make this at home. There is gonna be interesting food in home recipes coming up. Remember to save this page in your browser, and share it to your loved ones, friends and colleague. Thank you for reading. Go on get cooking!

Recipe of Award-winning Nivi's carmel apple French toast

Recipe of Award-winning Nivi's carmel apple French toast

Nivi's carmel apple French toast.

Nivi's carmel apple French toast

Hello everybody, I hope you're having an incredible day today. Today, we're going to prepare a special dish, nivi's carmel apple french toast. One of my favorites. This time, I'm gonna make it a little bit unique. This is gonna smell and look delicious.

Nivi's carmel apple French toast is one of the most well liked of recent trending foods on earth. It's easy, it's quick, it tastes delicious. It is appreciated by millions daily. Nivi's carmel apple French toast is something which I've loved my whole life. They're fine and they look fantastic.

To get started with this particular recipe, we must first prepare a few components. You can have nivi's carmel apple french toast using 14 ingredients and 3 steps. Here is how you cook that.

The ingredients needed to make Nivi's carmel apple French toast:

  1. {Prepare of apple glaze sauce.
  2. {Take 6 of or more (depending on family size) of your favorite apples i myself love gala or fiji apples.
  3. {Get 1 cup of give or take powdered sugar.
  4. {Prepare 2 tbsp of cinnamon.
  5. {Take of French toast.
  6. {Make ready 12 slice of of bread (i use texas toast best bread for french toast imo).
  7. {Get 6 of eggs whisked.
  8. {Get 1/2 cup of milk.
  9. {Make ready 1 of cinnamon.
  10. {Make ready 1 of butter.
  11. {Make ready of toppings.
  12. {Prepare 1 of regular pancake syrup (i like the butter flavored kind).
  13. {Take 1 of powdered sugar mixed with cinnamon.
  14. {Prepare 1 of your favorie carmel sauce (i use the smuckers ice cream topping kind).

Steps to make Nivi's carmel apple French toast:

  1. For the apple glaze: peel core and dice the apples throw in a pot with water and cinnamon boil apples til done! Drain and add enough powdered sugar to cover apples ( i usually add more cnnamon, i really love cinnamon can ya tell ;-) ).
  2. For the French toast: you can really use what ever French toast recipe you like its up to you but this is what i do! Take your eggs and whisk them with milk and cinnamon (see there i go with the cinnamon again lol) dip your bread in to the egg/milk mixture let sit for about 15 seconds so the bread soaks up the mix lay out on a prewarmed griddle about low/medium heat repeat til you get like six slices on your griddle you dont want then browned just til they get a wee bit tanned when done take off griddle and spread butter over each slice both sides like a pancake repeat with other six slices (if you have to whisk up some more egg/milk/cinnamon mixture) when done cut each slice in half diagonally lay out on plates with a slotted spoon spoon your apple glaze over your French toast then syrup sift powdered sugar over the syrup then carmel sauce.
  3. ****WARNING**** THIS IS NOT DIABETIC FRIENDLY LOADED WITH SUGAR AND CARBS i myself cant have much but when i do i really watch my blood glucose levels and keep my insulin handy. I do hope you try this and enjoy it as much as my family does.

So that's going to wrap it up with this exceptional food nivi's carmel apple french toast recipe. Thank you very much for reading. I am confident you will make this at home. There's gonna be more interesting food at home recipes coming up. Remember to save this page in your browser, and share it to your loved ones, colleague and friends. Thanks again for reading. Go on get cooking!

Recipe of Favorite Special jollof rice...#jollof rice contest#

Recipe of Favorite Special jollof rice...#jollof rice contest#

Special jollof rice...#jollof rice contest#. Jollof (/dʒəˈlɒf/), or jollof rice, is a rice dish popular in West and Sub-Saharan Africa. The dish is typically made with long-grain rice, tomatoes, onions, spices, vegetables and meat in a single pot, although its ingredients and preparation methods vary across different regions. Ingredients: Rice, Tomato base stew, Goat meat, meat stock, vegetables, kelewele, Link to Bronya Jollof Base Stew: https The Ultimate Party Jollof Recipe.

Special jollof rice...#jollof rice contest# Nigerian Jollof Rice or Jellof rice is a rich and incredibly tasty west African one-pot Meal. Jollof rice is one of the most common West African dishes eaten in the regions of Nigeria, Ghana, Togo. Adapted by The New York TImes.

Hello everybody, I hope you're having an incredible day today. Today, I'm gonna show you how to prepare a special dish, special jollof rice...#jollof rice contest#. One of my favorites. This time, I will make it a bit unique. This will be really delicious.

Special jollof rice...#jollof rice contest# is one of the most popular of recent trending foods in the world. It's enjoyed by millions every day. It's simple, it is fast, it tastes delicious. They are fine and they look fantastic. Special jollof rice...#jollof rice contest# is something that I've loved my whole life.

Jollof (/dʒəˈlɒf/), or jollof rice, is a rice dish popular in West and Sub-Saharan Africa. The dish is typically made with long-grain rice, tomatoes, onions, spices, vegetables and meat in a single pot, although its ingredients and preparation methods vary across different regions. Ingredients: Rice, Tomato base stew, Goat meat, meat stock, vegetables, kelewele, Link to Bronya Jollof Base Stew: https The Ultimate Party Jollof Recipe.

To get started with this particular recipe, we must first prepare a few components. You can have special jollof rice...#jollof rice contest# using 16 ingredients and 4 steps. Here is how you can achieve that.

The ingredients needed to make Special jollof rice...#jollof rice contest#:

  1. {Prepare of rice.
  2. {Get of medium potatoes chopped.
  3. {Make ready of tomatoe paste.
  4. {Make ready of Chopped green onion.
  5. {Take of bulb chopped onion.
  6. {Prepare of Chicken broth as required.
  7. {Get of Maggi.
  8. {Prepare of Palm oil.
  9. {Make ready of curry.
  10. {Prepare of black pepper.
  11. {Get of nutmeg.
  12. {Get of Paste of scotch bonnet,red bell pepper,ginger and garlic.
  13. {Prepare of For garnishing:.
  14. {Take of fried plantain.
  15. {Make ready of chicken drump.
  16. {Get of My home made salsa and my salad.

The chef Tunde Wey is based in New Orleans, but he was born in Nigeria, where jollof rice is a well-loved dish. This is what you should prepare for that special person in your life or when you are playing host to several special people. Nigerian Jollof Rice - a spicy and vibrant one-pot tomato rice, this is probably the best-known Jollof rice is a dish popular not only in Nigeria but in several other West-African countries, such as Senegal. Jollof rice is eaten in many parts of West Africa and is a traditional dish in Nigeria, Senegal and Ghana.

Instructions to make Special jollof rice...#jollof rice contest#:

  1. Wash rice,par boil and set aside...(the reason I par boiled the rice is just to reduce the starcheness).
  2. Add in Palm oil in a pot,on a medium low heat saute chopped onion,and cook for 3mins, then add in your chopped potatoes cover and cook for at least 6 mins,then add in your tomato paste,paste of scotch bonnet,bell pepper, garlic and ginger paste cover and cook for atleat 5 mins.
  3. Then add in your chicken broth and all your seasonings cover and bring to a boil...when it's boil add in your parboiled rice,cover and cook untill it's has almost absorb it's liquid then add in your chopped green onion and cook for 2 mins...Valla jollof is ready enjoy with chilled water or refreshing drink.....garnish with plantain,chicken drump,my home made salsa and my salad.....enjoy yum yum yum.....
  4. Note: remember we've already par boiled our rice so don't put too much water when cooking other wise you'll end up with a mushy jollof rice which we all don't want.....

So what's so special about it and which country does it best? This easy Jollof Rice recipe and Instant pot Jollof Rice is a spiced tomato rice served all across West Africa. Served during all celebrations like wedding, birthdays, Christmas and more. Flavorful West African Jollof Rice is so amazing, brown rice cooked in pureed tomatoes, bell No special occasion in Jamaica is complete without rice and peas, and I'm sure many of us have had. An easy African Jollof Rice Recipe for a non-traditional weeknight side or special occasion side Jollof rice is a one-pot spicy tomato-based rice dish common in countries like Senegal, Nigeria.

So that is going to wrap it up with this special food special jollof rice...#jollof rice contest# recipe. Thanks so much for reading. I'm confident that you can make this at home. There's gonna be interesting food in home recipes coming up. Don't forget to save this page in your browser, and share it to your family, colleague and friends. Thank you for reading. Go on get cooking!

Easiest Way to Make Perfect Peachy Pork Picante

Easiest Way to Make Perfect Peachy Pork Picante

Peachy Pork Picante.

Peachy Pork Picante

Hey everyone, it is me, Dave, welcome to our recipe page. Today, we're going to prepare a distinctive dish, peachy pork picante. One of my favorites food recipes. For mine, I'm gonna make it a bit unique. This will be really delicious.

Peachy Pork Picante is one of the most popular of current trending foods on earth. It's easy, it's quick, it tastes delicious. It is enjoyed by millions every day. They're fine and they look wonderful. Peachy Pork Picante is something which I have loved my entire life.

To get started with this recipe, we must first prepare a few components. You can cook peachy pork picante using 7 ingredients and 4 steps. Here is how you can achieve it.

The ingredients needed to make Peachy Pork Picante:

  1. {Take of boneless pork loin, cut into cubes.
  2. {Make ready of taco seasoning.
  3. {Prepare of water.
  4. {Get of long grain rice.
  5. {Get of vegetable oil.
  6. {Take of salsa.
  7. {Prepare of peach preserves.

Instructions to make Peachy Pork Picante:

  1. In a gallon Ziploc bag, add pork & taco seasoning. Shake bag to coat pork. Marinate in refrigerator for 1 to 2 hrs..
  2. In your Tupperware microwave rice maker, add rice & water. Put insert & cover on rice maker. Microwave for 13 minutes. (If you don't have a rice maker, can use any microwave safe dish, cover & cook for same amount of time). Cover to keep warm after done..
  3. Heat the oil in large skillet. Add the pork. Cook, stirring frequently, until pork is browned on all sides, about 10 minutes. Stir in salsa & preserves. Reduce heat to low..
  4. Cover the skillet. Simmer, stirring occasionally, until pork is cooked through, about 20 to 25 minutes. Serve over rice..

So that is going to wrap this up with this exceptional food peachy pork picante recipe. Thanks so much for your time. I am sure you will make this at home. There's gonna be interesting food in home recipes coming up. Remember to save this page in your browser, and share it to your family, friends and colleague. Thank you for reading. Go on get cooking!